Hints and Tips Page 8
Click on any of the thumbnails below for a more detailed photo
![]()
Hints and Tips Page
8
Click on any of the thumbnails
below for a more detailed photo
|
Photographing Knife Blades:
A Primer I have gotten numerous inquiries about the problems involved with photographing knife blades, but if you've taken a close looks at the photos on this site, you'll soon realize that I'm not the person to be giving instructions here. I asked knifemaker Bob Bair to share a few of his secrets after seeing the wonderful photos he has submitted for the Gallery Pages. Missed them? Here's a few examples: Example1 Example2 Example3 Example4 Example5 Example6 |
|
|
The big problem, as you might well imagine,
is the shiny mirror finish on the blade itself. If your subject is well lit
( as you're supposed to do in a photo studio) , the glare will be
reflected and will look horrible. Or worse, will reflect the dark ceiling or
sky making the blade look even worse. And with a mirror finish, there
doesn't seem to be any in between. Or is there?
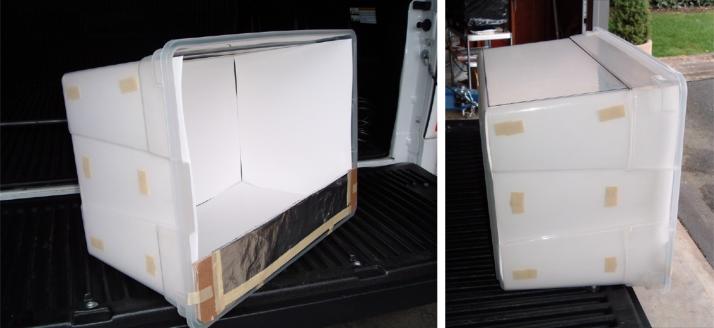
The answer is a light diffuser box, to diffuse the bright lights used in photography . The diffuser box also gives the shiny finish of the blades a neutral white background to reflect. |
|
|
|
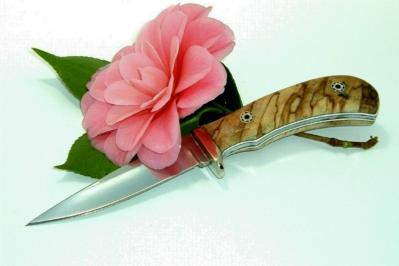
Here's what we're trying to avoid: the reflection and glare on a mirror finish blade. |
|
Bob uses a utility container lined with translucent paper to evenly diffuse the light. The hole at the top is covered with more translucent paper to allow the light in. Notice the foil covered strip at the front to reflect light back in to get rid of shadows. Bob's box is 20 x 14 x 12 but you can make this any convenient size. |

|
And here's the stand that Bob made. You can get creative here: I have something similar and just set mine on a desk. Notice the three lights above( Bob uses 75 watt fluorescent daylight bulbs but I've seen other folks use 150 watt reflector bulbs) and the power strip to control all three. |

|
Digital cameras offer a real advantage in that you can shoot dozens of pictures without wasting expensive film. I might shoot 20 or so pictures of the same subject experimenting with various settings and angles to get one halfway decent picture. |
|
|
Here's a sketch of my setup: a light wooden frame over the workspace covered with a translucent paper or plastic to diffuse the light. Two clamp on lights off to the side are used to control the shadows. |
|
Last hint: dress it up to make it interesting. This is Bob's picture but I use small wads of clay under the blade to hold it in a posed position. |
|
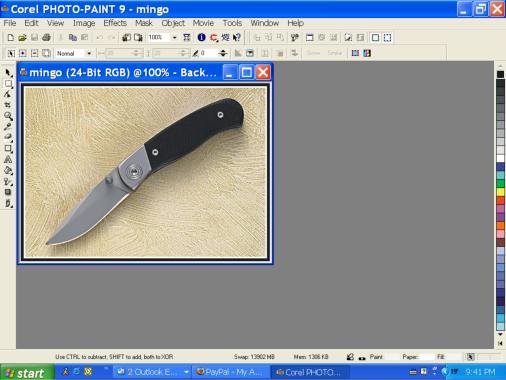
A good picture can always be made better through the magic of many of the PC paint programs available for the computer. Most will allow you to adjust contrast, brightness and most importantly will allow you to crop the photo for a pleasing content. A new one that just came out that is pretty impressive and free is Aviary. No downloads needed either--- It's web based . I use Corel PhotoPaint or Xara. |
| There's another quick tutorial on the Knife Network website I found about building an inexpensive light box that would be well worth your time reading. Click HERE | |

|
Note: One of my customers wrote to me to let me know that he has been getting good results by shooting outdoors but waiting for an overcast day to soften the light and shadows. (I used this picture from the Concho Tutorial) |
|
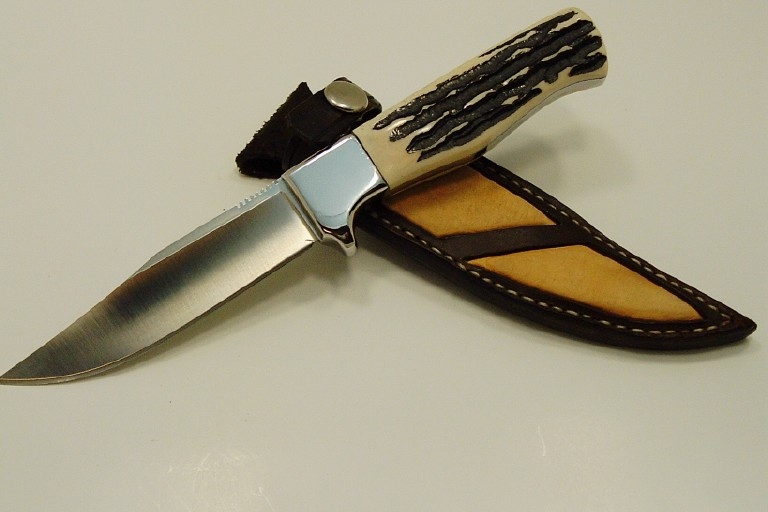
Knife Pouch Sheath For an easy way to carry your favorite folding blade on your belt, nothing beats a pouch type of sheath. Using the moldable plastic properties of a nice piece of tooling leather, they are easy to make and can be dressed up for a really classy look. Very functional and useful. |
|
|
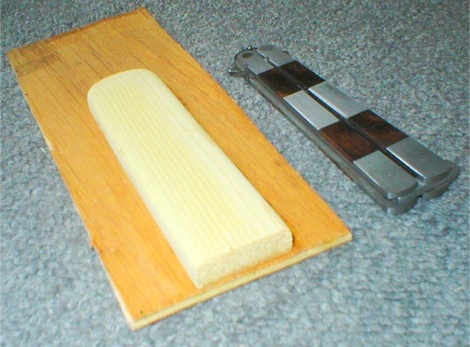
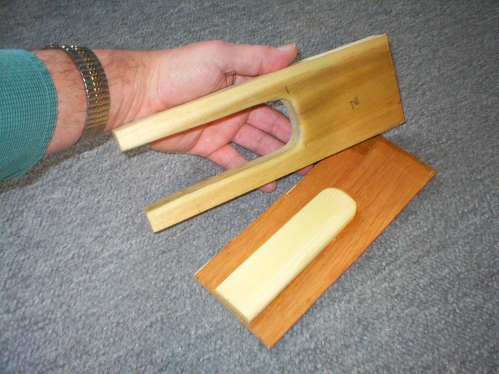
I'm going to make a pouch sheath for my favorite balisong and I start my making an inner mold piece the same size as the knife itself. Shape it with rounded corners and clue it down to a larger backer scrap of wood. |
|
The top part of the mold has a cutout slightly larger than the inner mold piece to allow for the thickness of the leather. Again, notice the rounded inner corners. |
|
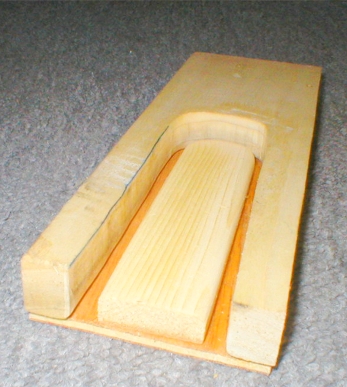
This is what the two halves of the mold should fit together like. |
|
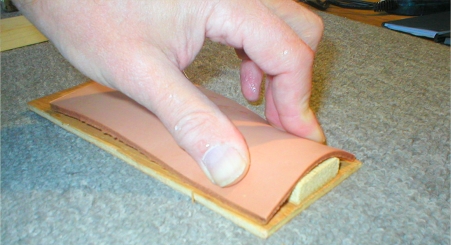
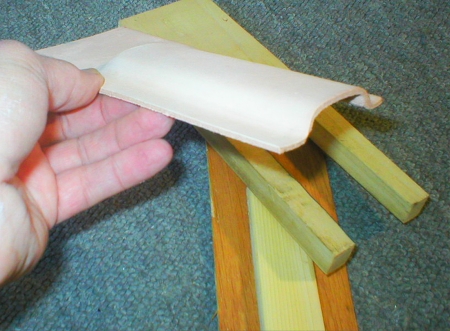
Soak a good piece of 8-9 ounce tooling leather in a pan of warm water for a few minutes. Start my using your fingers to mold it around the inner form. Try not to dig into it with your fingernails and keep the texture smooth. |
|
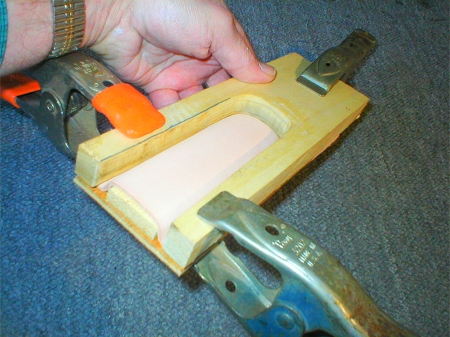
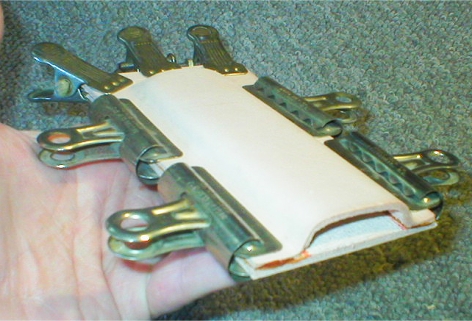
After getting it molded to a rough shape, put the top form on and hold it in lace with some strong spring clamps. This will accomplish molding it to the final shape. Let dry overnight. |
|
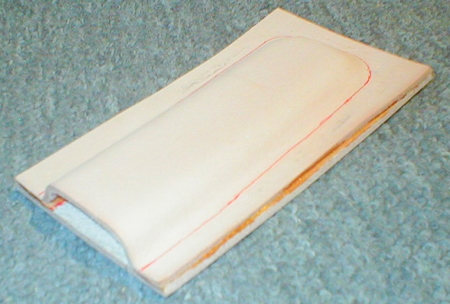
This is what the molded piece should like when it has dried. |
|
Cut another piece of tooling leather and use a good contact cement to glue it to the back. Paper clamps wok well to hold it in place until the contact cement cures. |
|
When cured, this is what you end up with. Notice that I used a red magic marker to draw where the stitching will go. ( The red will disappear under a light coat of leather dye). |
|
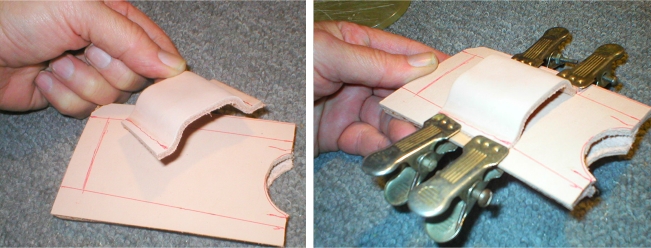
I form a belt loop on the form, much the same way as I formed the front of the sheath. This is glued and clamped to the back. Note: I opted for a horizontal carry sheath. If you decide to make a vertical carry sheath, you should probably think about stitching this to the back prior to attaching the front. Also notice the cutout I made at the front to make finger grip easier. |

|
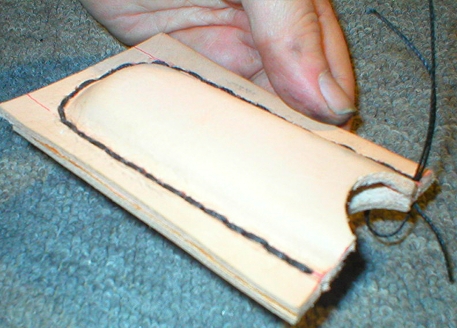
I use a Dremel with a fine drill bit to drill the holes that I'll use for stitching and proceed to do a figure * stitch all the way around. |
|
Here the stitching is done. I still need to cut the excess off closer the the stitching. |
|
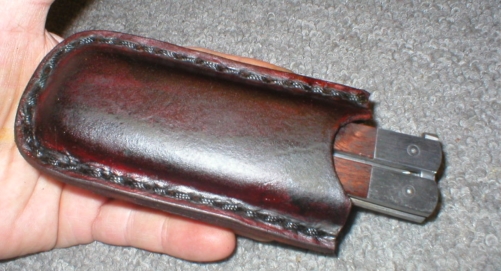
I cleaned the leather with acetone, stained it and this is what it ends up like. Should look pretty good on my belt. |
Hints and Tips Page [1] [2]
[3] [4]
[5] [6]
[7] [8]
[9] [10]
[11] [12]
[13] [14]
[15] [16]
[17]
Next
Got a good tip that you think your fellow knifemakers would like to know about? Drop me a note at pjp2@northcoastknives.com