![]()
Tutorials:
Leather Sheaths
Click on any of the thumbnails
below for a more detailed photo
|
|
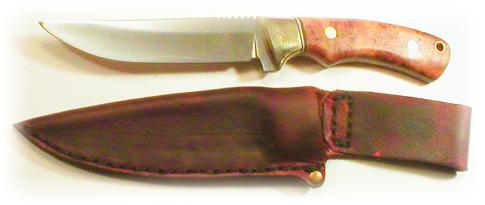
Since you probably don't want to carry that brand new, gorgeous Bowie in your back pocket, we're going to have to learn to make a sheath to carry your knife safely in. A leather sheath is probably the easiest way to go for a beginning project. Please note: I have seen some sheaths that would easily be qualified as works of art that should be framed and displayed. This, however, is a simple, functional sheath that can serve as a starting point to learn the art of leatherwork. If you'd like to dress this up more, check out one of the many good leatherworking books available at any library and look up embossing and tooling. | |
| Please Note: This tutorial is a re-do of the original one. The Leather Sheath Tutorial was one of the first ones I wrote, more than three years ago, and not only have I learned more, many folks have emailed me with very helpful suggestions. If you really, really want to see the original tutorial, please click HERE. | ||
| Most of the supplies shown here can be easily found at any leatherwork or craft shops, such as Tandy. I tried to carry some of the more basic stuff on the Sheaths Page, just to get you started. I have, however seen nice sheaths made from leather scraps donated by a local shoemaker or an old pair of boots obtained from Goodwill . | ||
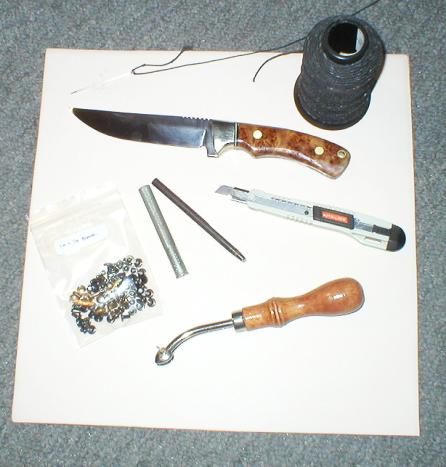 |
You'll need a nice piece of leather ( pick it yourself or specify 8 to 9 oz. weight, a measure of thickness. Usually available in convenient 12" x 12" pieces), rivets and rivet set , a 1/8" hole punch ( Yeah, I guess you could use a drill bit in a pinch), waxed stitching thread and a heavy stitching needle . Oh, and the knife. ( The knife used here, by the way, is a modified Shark with Maple Burl Scales ) | |
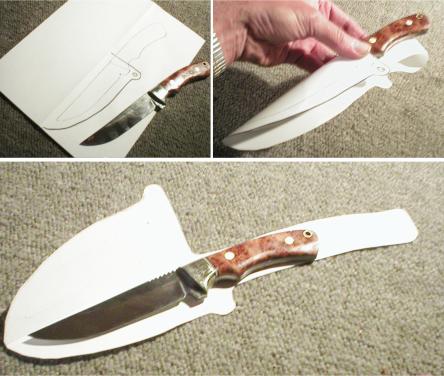 |
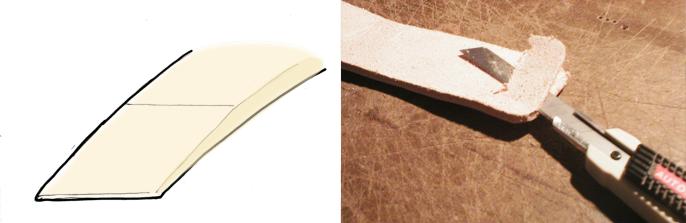
Can't get there unless you know where you're going. Lay out the knife on a folded sheet of typing paper and trace it to define the profile. It's easier to test fit it this way and you may have to try several layouts before you find the right one. Before cutting the leather, give some thought to where you're going to carry your knife and how it's going to be oriented. I'm right handed and am going to set this up to carry on my left hip for an opposite hand draw. See what's comfortable for you (or your client ) and plan accordingly. | |
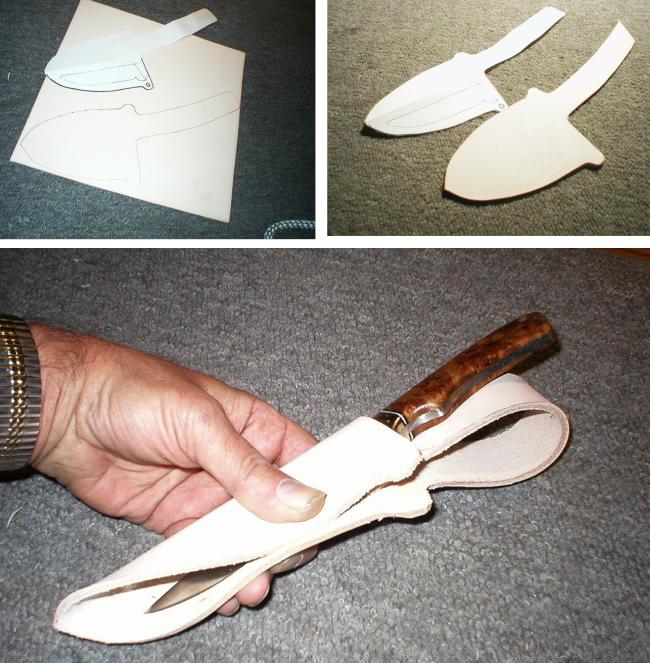 |
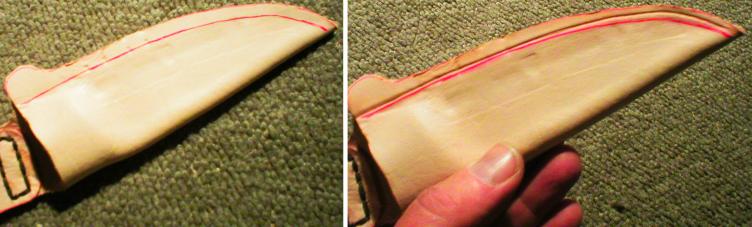
Use you pattern to cut the leather out. Do another trial to make sure of the fit, making sure there is going to be enough excess around the edge for stitching. | |
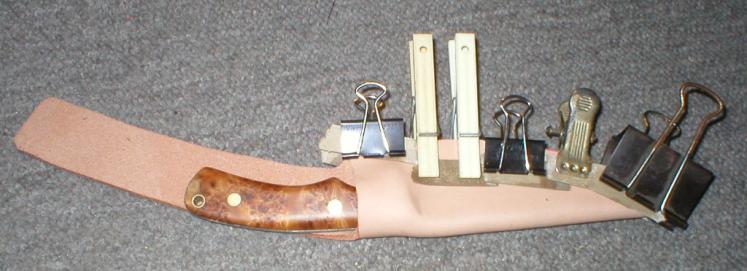 |
Wet the leather and start to form it around your blade. I use some paper clamps to hold it in place. Notice the cardboard strips under the clamp jaws to keep it from marring the leather. Form the leather around the guard with your fingers while it's still wet and elastic. Note: don't eat potato chips while you're doing this to keep the leather clean and grease free or you'll have problems with the stain later. | |
 |
Before we close up the pouch , we're going to attach the belt loop. Start by thinning the inside surface of the belt loop. We don't want the guard to get hung up on this. I use one of those snap off blade craft knives with the blade extended. | |
 |
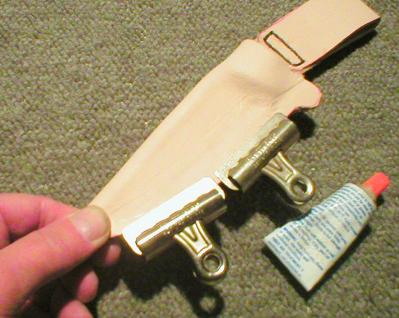
Glue the belt loop in place with a good contact cement . This will add strength, but the major strength will come from the stitching we'll do next. | |
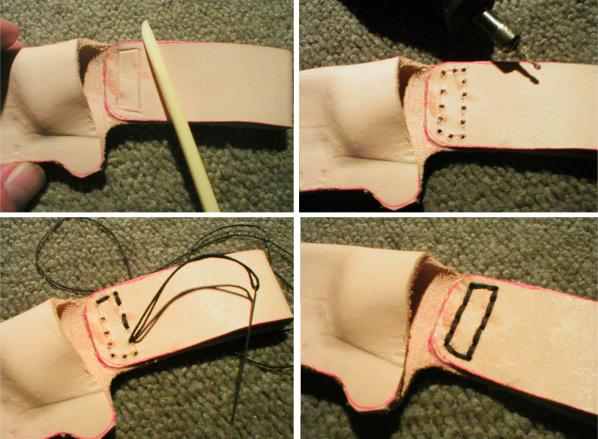 |
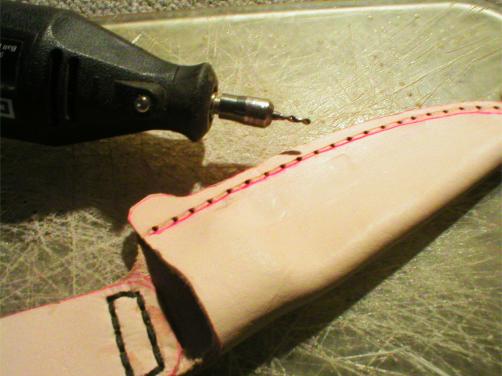
Before beginning the stitching, engrave a channel on the front and back that the stitching will be recessed in, helping it sit more flush to the surface. Although there are fancy tools for this, I use the shaped end of a plastic chopstick. I use a small diameter drill in a Dremel Mototool to make the stitching holes and then use a figure 8 stitch to pull it all together. | |
 |
By the way, this is what a figure eight stitch is. It's over and under all the way around and using the reverse pattern all the way back. | |
 |
Let's start closing up the pouch. I use the contact cement again to glue both sides together in preparation for the stitching. Apply a thin coat to both of the inside facing sides and press together for a few minutes. A few clamps wouldn't hurt. | |
 |
I got out my red felt tip pen aagain to mark the line that the stitching is going to follow. And since we're going to want the stitching recessed for protection, I get out my shaped chopstick again to engrave a channel. Do this on the front and back. Wetting the leather again while you're doing this will help. | |
 |
I use the Dremel again with a fine drill to make the holes that I'll use for stitching. Follow the engraved line we just made. | |
 |
OK, let's start stitching. I thread harness needle and make a loop of waxed thread about two and a half times as long as the length of the sheath to give me enough excess so I won't end up splicing the thread halfway through. That would be a problem. Pull it as tight as you can after each pass. | |
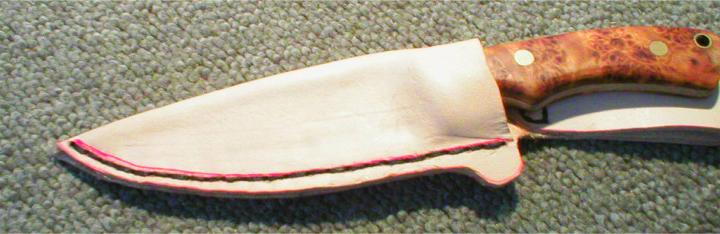 |
The stitching is done and I slip the knife back in to check the fit. You can wet the sheath in areas for tweaking the fit to make sure that it's tight but still slides in easily. | |
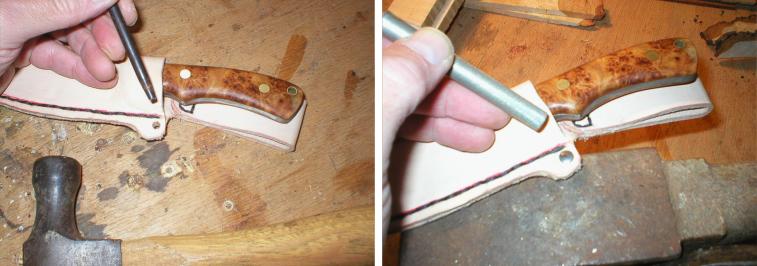 |
I should have explained earlier that the little tab that we left earlier is for a reinforcing rivet. I use a 1/8" hole punch to make the hole and a rivet setter to fasten the rivet. I try to position this to trap the ends of the stitching thread to lock them in. | |
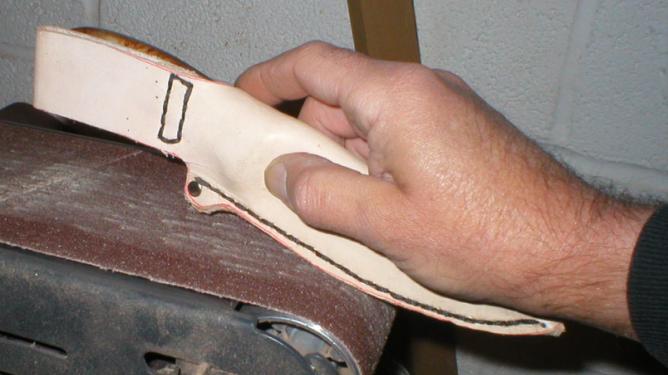 |
I spend a few minutes on the belt sander cleaning up the edges of the sheath. | |
 |
I apply the a dye made especially for leather with a small foam brush and gave the sheath three light coats to get an even finish. Warning: don't get this dye on your hands or it'll be there for a week. If it gets on your carpet or clothes, it's there forever. | |
 |
After the dye is dry, I apply two light coats of Neatsfoot Oil for protection with a soft cloth. When dry ( just a few minutes) , buff it to a nice stain sheen. I like it. | |
|
Done. Maybe not too fancy, but it sure is functional. You can always add embellishments, embossing, inlays and other decorative details but we'll talk about that next time. | |
| This tutorial was meant as the most basic introduction to leatherworking. Leatherworking is an art that can take a lifetime to master and involves a lot of techniques that I couldn't even begin to cover in a one page tutorial. Do some research, get some books at the library, take a closer look at sheaths that you see out there, and practice, practice, practice. | ||
| For a slightly advanced tutorial on leather knife sheath making, brought to you by Bruce at Bek Nives, click HERE. Very well written tutorial. | ||