![]()
Tutorials:
Leather Sheaths
Click on any of the thumbnails
below for a more detailed photo
|
|
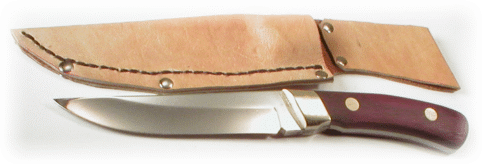
Since you probably don't want to carry that brand new, gorgeous Bowie in your back pocket, we're going to have to learn to make a sheath to carry your knife safely in. A leather sheath is probably the easiest way to go for a beginning project. Please note: I have seen some sheaths that would easily be qualified as works of art that should be framed and displayed. This, however, is a simple, functional sheath that can serve as a starting point to learn the art of leatherwork. If you'd like to dress this up more, check out one of the many good leatherworking books available at any library and look up embossing and tooling. | |
| Most of the supplies shown here can be easily found at any leatherwork or craft shop, such as Tandy. I have, however seen nice sheaths made from leather scraps donated by a local shoemaker or an old pair of boots obtained from Goodwill . | ||
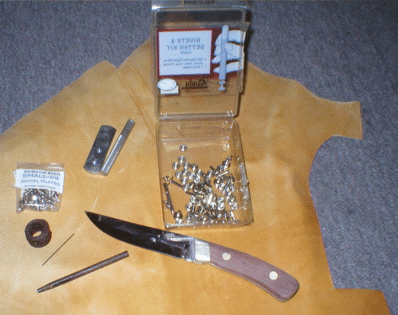 |
You'll need a nice piece of leather ( pick it yourself or specify 8 to 9 oz. weight, a measure of thickness), rivets and rivet set ( usually available in a set), a 1/8" hole punch ( Yeah, I guess you could use a drill bit in a pinch), waxed stitching thread and a heavy stitching needle . Oh, and the knife. ( The knife used here, by the way, is a modified Shark with Purpleheart scales ) | |
 |
Use a folded piece of typing paper and trace the knife on it, and use this outline to lay out the sheath. Much cheaper to goof with a piece of typing paper than an expensive piece of leather. Before cutting the leather, figure out where you're going to carry your knife and how it's going to be oriented. I'm right handed and am going to set this up to carry on my left hip for an opposite hand draw. | |
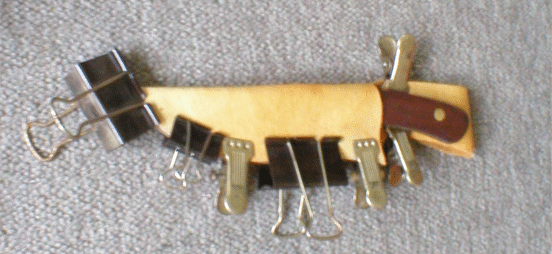 |
After you've decided on orientation and cut the leather, fold it over into it's final shape. Use good old fashioned rubber cement to glue the edges and use clips to hold it in place until the rubber cement dries. I usually lay these out slightly oversized figuring that I can cut back the edges later | |
 |
I use a 1/16" drill to put the holes along the edge for the stitching. A true craftsman would probably use an awl, but I figured out that this is a quicker and easier way to get the needle through. I traced the path with a pencil while the knife was in the sheath for a snug fit. | |
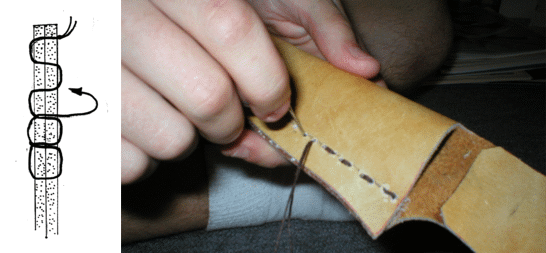 |
Use a good, heavy, waxed thread for stitching with a heavy stitching needle ( I believe this is called a harness needle). I use a figure "8" stitch going down one side and back the other to give the look of one continuous stitch. | |
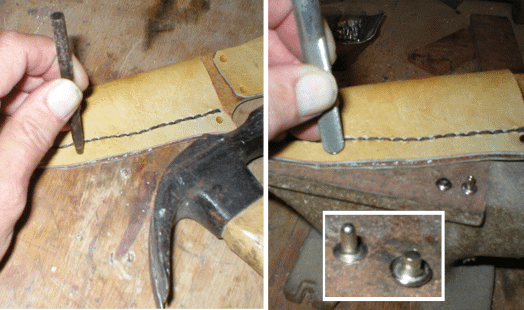 |
I use a 1/8" leather punch to add the holes for the rivets, although a 1/8" drill would work in a pinch. Use a rivet set to peen the rivets in place. ( Rivet sets are usually available with the rivets in a set). When I was done, I had a much better idea how much excess could be trimmed from the edge. | |
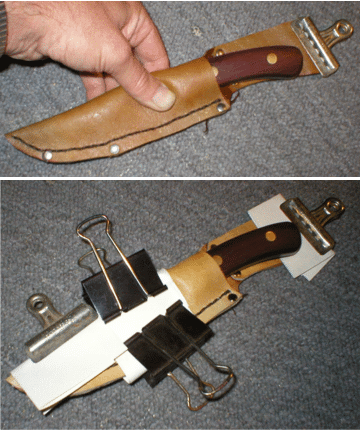 |
Wet leather can be molded slightly to fit around the bolster better. I soaked the sheath in hot water and worked the shape by hand. This can be speeded up by using a hair dryer or by using padded clips to hold the shape overnight. ( The clips have to be padded to keep from leaving a crease in the wet leather). | |
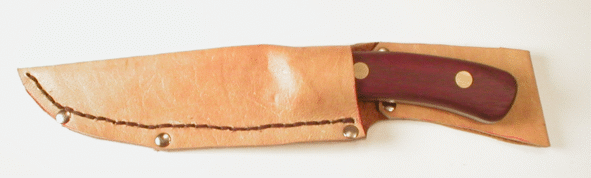 |
And there she is. I used some saddle soap for a protective finish that would keep the natural tan color. May not be the prettiest or fanciest sheath you've ever seen, but it sure is functional. Use this as a starting point to learn the fine art of leatherworking and your sheath can be a work or art too. | |