![]()
Tutorials: Bear Claw
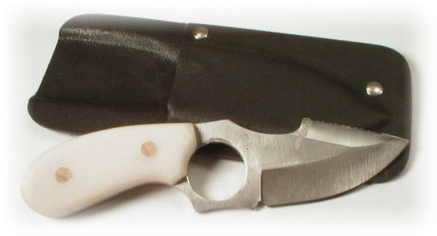
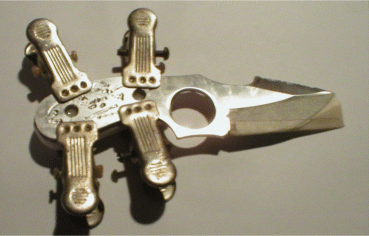
| I love this little knife and even though I sell a lot of them, it seems to me that it should still be more popular. The unusual shape locks into your hand for an incredibly safe and solid grip even in cold, wet or otherwise adverse environments. . It becomes an extension of your hand, a Bear Claw. I'm also going to show you how to make a KYDEX sheath for safe pocket or neck ( on a loop of leather) carry. Also, it's small size ( that's only a 2 1/2" blade! ) and light weight should make this the absolute ideal backpacking knife! |
Click on any of the thumbnails below for a more detailed photo
|
|
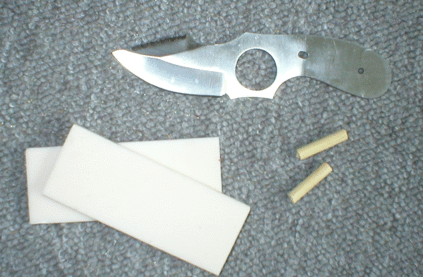 |
OK, here's what we start with: the Bear Claw knife blade, a couple of handle scales and a pair of pins. For scales, I split a chunk Corian counter top material I had in a light cream color. I like Corian for scales due to it's appearance and durability. The scales were cut from to 1/2" thick scrap and split to two 1/4" scales on the bandsaw. Using wood pins ( as opposed to the more traditional brass or nickel silver) is a bit different, but I'll explain my rationale in a minute. |
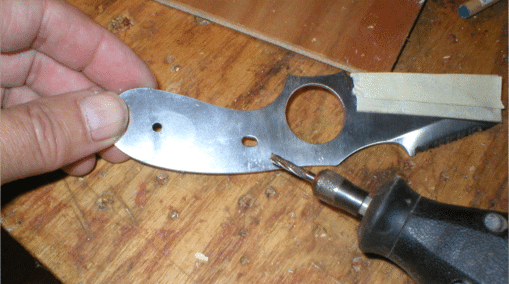 |
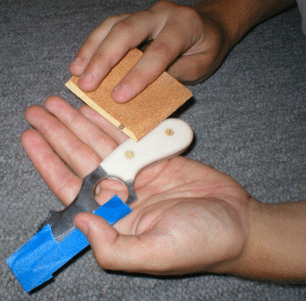
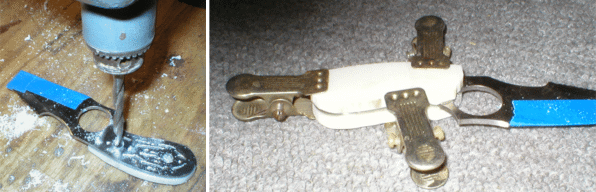
Oh, oh. The pin holes in the blade are made for 1/8" pins and I want to use 1/4" wood pins. I use a carbide burr bit in a Moto Tool to enlarge the hole. Use a uniform circular motion while cutting. It goes surprisingly fast. I thought this would be a lengthy operation due to the hardness of the knife blade. As it turns out, this was a ten minute job . Check for fit often as you go along. While you're doing this, "nick" the metal handle (tang) with the carbide bit to give the epoxy that you're going to use something to bite into. | |
|
|
Trace the blade on some 3" x 5" card stock to plan the shape of the scales. Cut this out and trace on the scales with a permanent magic marker. Use a bandsaw, jigsaw or coping saw to cut just outside the outline. | |
 |
Epoxy the first scale on with a good epoxy. Like the fancy clamping system? They're made from a set of the clamps that come on a coathanger used to hang pants up. Notice the "nicks " on the tang to give the epoxy something to grab onto. This improves the holding power of the epoxy tremendously. Similar nicks were made to the inside of the Corian handles. | |
 |
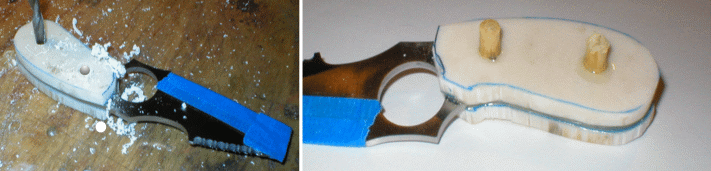
Drill a 1/4" hole through the blade and Corian handles. this will give you a set of guide holes to drill the second scale after it's epoxied in place. Go ahead and epoxy the second scale in place and clamp it overnight. |
|
 |
Drill through the second scale using the guide holes from the first
scale. I used 1/4" dowels for pins on this model instead of the more
traditional brass or nickel silver pins. After some experimentation, I
firmly believe that the epoxied wood to Corian bond is actually stronger
than a similar bond with metal pins. This is especially important in a
knife like this with thin scales ( between 1/8" and 3/16")
.
|
|
 |
Trim the pins and clean up the profile on the bench sander. One of the
scales I cut was a tad thicker than the other so now is the time to make
it uniform. I used a Dremel Moto Tool with a small drum sander attachment
to "bevel" the edges of the scales before hand sanding just to
speed up the finishing process. Go slow, using long, even strokes just
like you were carving the scales. |
|
|
|
Final shape and finish to the corian handle is going to have to be done by hand. As much as I love power tools, I do have to admit that hand finishing always does a nicer looking job. But I'll deny saying that if anyone asks. |
|
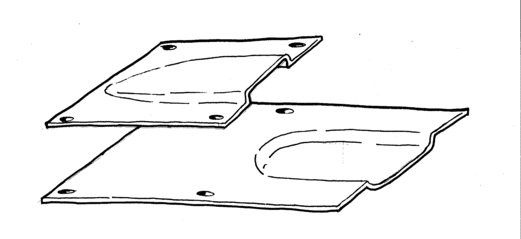 |
Here's a drawing for the two pieces that will be molded to form the KYDEX sheath. You can see that it's a pretty easy, straightforward construction. |
|
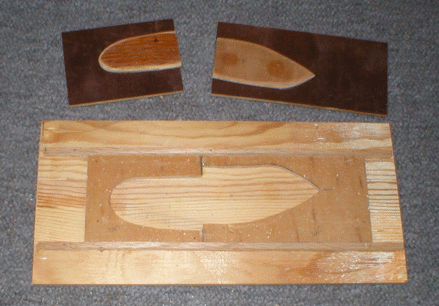 |
Here's the jig I made out of 1/4" plywood to mold the
front and back halves of the KYDEX sheath. If you haven't already
done so, I'd recommend spending a few minutes going through the more
detailed step by step KYDEX Tutorial to get a feel for how this is
done. Click
HERE. KYDEX isn't tough to work with but does require a little
bit of common sense. |
|
 |
This is the back of the knife sheath being molded. Heat the KYDEX with a heat gun until it's soft and rubbery and them push the mold ( I guess this would be called a male plug) into the jig trapping the small sheet of KYDEX in between to form it. Should take less than a minute or so to cool off. Repeat for the front half. Remember that KYDEX has a smooth and a rough side. Always keep track of which side is going to be facing out. | |
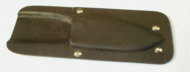 |
a I super glued the front and back pieces together and used those fancy clamps from step 5 to hold the whole thing temporarily together while I drilled the corners with a 1/8" drill and used some small silver rivets to make it more permanent. A few quick passes on the bench sander to clean up the edges and round the corners, and you're done. Start to finish ( not counting time for building the jig ) took me about 45 minutes. | |
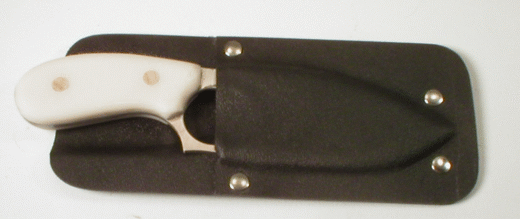 |
If the knife is too loose in the sheath , heat the front slightly with the heat gun and push it against the knife while the knife is in the sheath. Not too loose or tight, you want this to have a snug, custom fit feel. | |
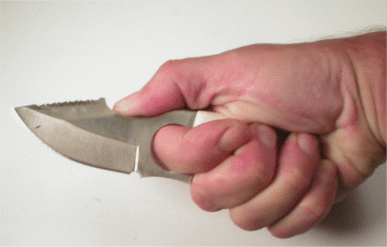 |
And you wonder why this is called a Bear Claw? This is a knife that won't slip from your grip no matter what the environment and becomes an extension of your hand. You can get a lot of hard work from this small 2 1/2" blade! |
To Purchase the Bear Claw
knife blade, please visit Blades, Page 3
For KYDEX sheet, please visit Supplies,
Page 3
| I'm now carrying Corian for knife handles and it's on Supplies, Page 1. You could also do what I used to do: look through the dumpster behind a kitchen counter remodeling contractor for their scraps! |