![]()
Tutorials
Puukko: Page 1

|
|
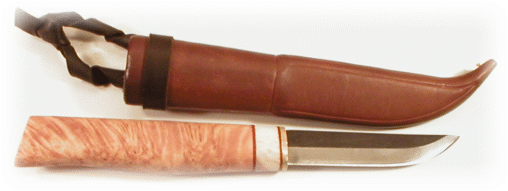
The Finnish Puukko is a design that goes back 1000 years and was designed by a people used to living in a harsh and challenging environment. Today, the puukko is an everyday knife that is used for everything from hunting, fishing and garden work to opening boxes in the warehouse. Traditionally the handle is made of birch ( Please note that this construction article features a birch burl handle whereas the kits are now shipping with a curly birch. Curl or burl, I like them both, but it makes a difference to some folks ) with horn spacers for decoration. ( To purchase the Puukka Kit, please see Blades, Page 4 ) |
||||

|
Here's what comes in the kit. I like the blade. This is a good, useful size and the quality is very nice. The unfinished sheath is very nice, too but I don't have a clue what that little rivet is for. I've never worked with honest-to-goodness real horn before so this spacer should be interesting. | ||||

|
Rather than splitting the block like I did for the hidden tang project, I'm just going to drill a tang hole with a 3/8" spade bit. The piece of blue tape tells me when I've drilled deep enough. Go slow , constantly checking that you're drilling straight. | ||||

|
You'll also need to drill a 1/16" "weep" hole to allow the excess epoxy and air bubbles to escape. This should intersect the tang hole you just drilled. | ||||

|
I'm going to use a fine carbide burr bit to cut the tang clearance hole in the horn spacer . I traced the clearance hole from the brass guard to act as a guide. | ||||

|
Spend a few seconds sanding the ends of the horn spacer to make them perfectly flat |
||||

|
Do the same with the brass guard. This was a stamped item which only needed a little clean up. I did, however, need to spend a few minutes with some needle files to slightly enlarge the tang clearance hole. | ||||

|
The spacers were a little bit thinner than the fiber sheets I sell and were easily cut with an X-acto knife after scoring a few times. | ||||

|
Slide the brass guard on ( this should be a tight friction fit) and coat the back with a thin layer of a good 3 hour epoxy. Slide the first fiber spacer and and repeat with the horn section and second fiber spacer. | ||||

|
Use the rest of the epoxy to fill the tang hole in the handle. Don't be stingy. There should be enough that it squeezes out the front and the weep hole. Make sure that all parts are positioned tightly together before setting it aside to cure. | ||||

|
I didn't trust the tang hole I drilled to be 100% straight, so I drew a new reference center line on the handle using a ruler placed parallel to the blade itself. I was right. The drilled hole was slightly off. | ||||

|
I used the bandsaw to cut the sides to true them up and make them equal. |
||||

|
As long as I'm at the bandsaw, I might as well trim the side profile also. |
||||
Puukko: Page 2